How to set up Easy Tag in Shopify
-
Go to EasyTag home screen
Open your Shopify admin and go to Apps->Easy Tag - GTM & data layer

-
Go to Settings and connect your Google account
Go to EasyTag`s Settings screen and click the “Connect” button
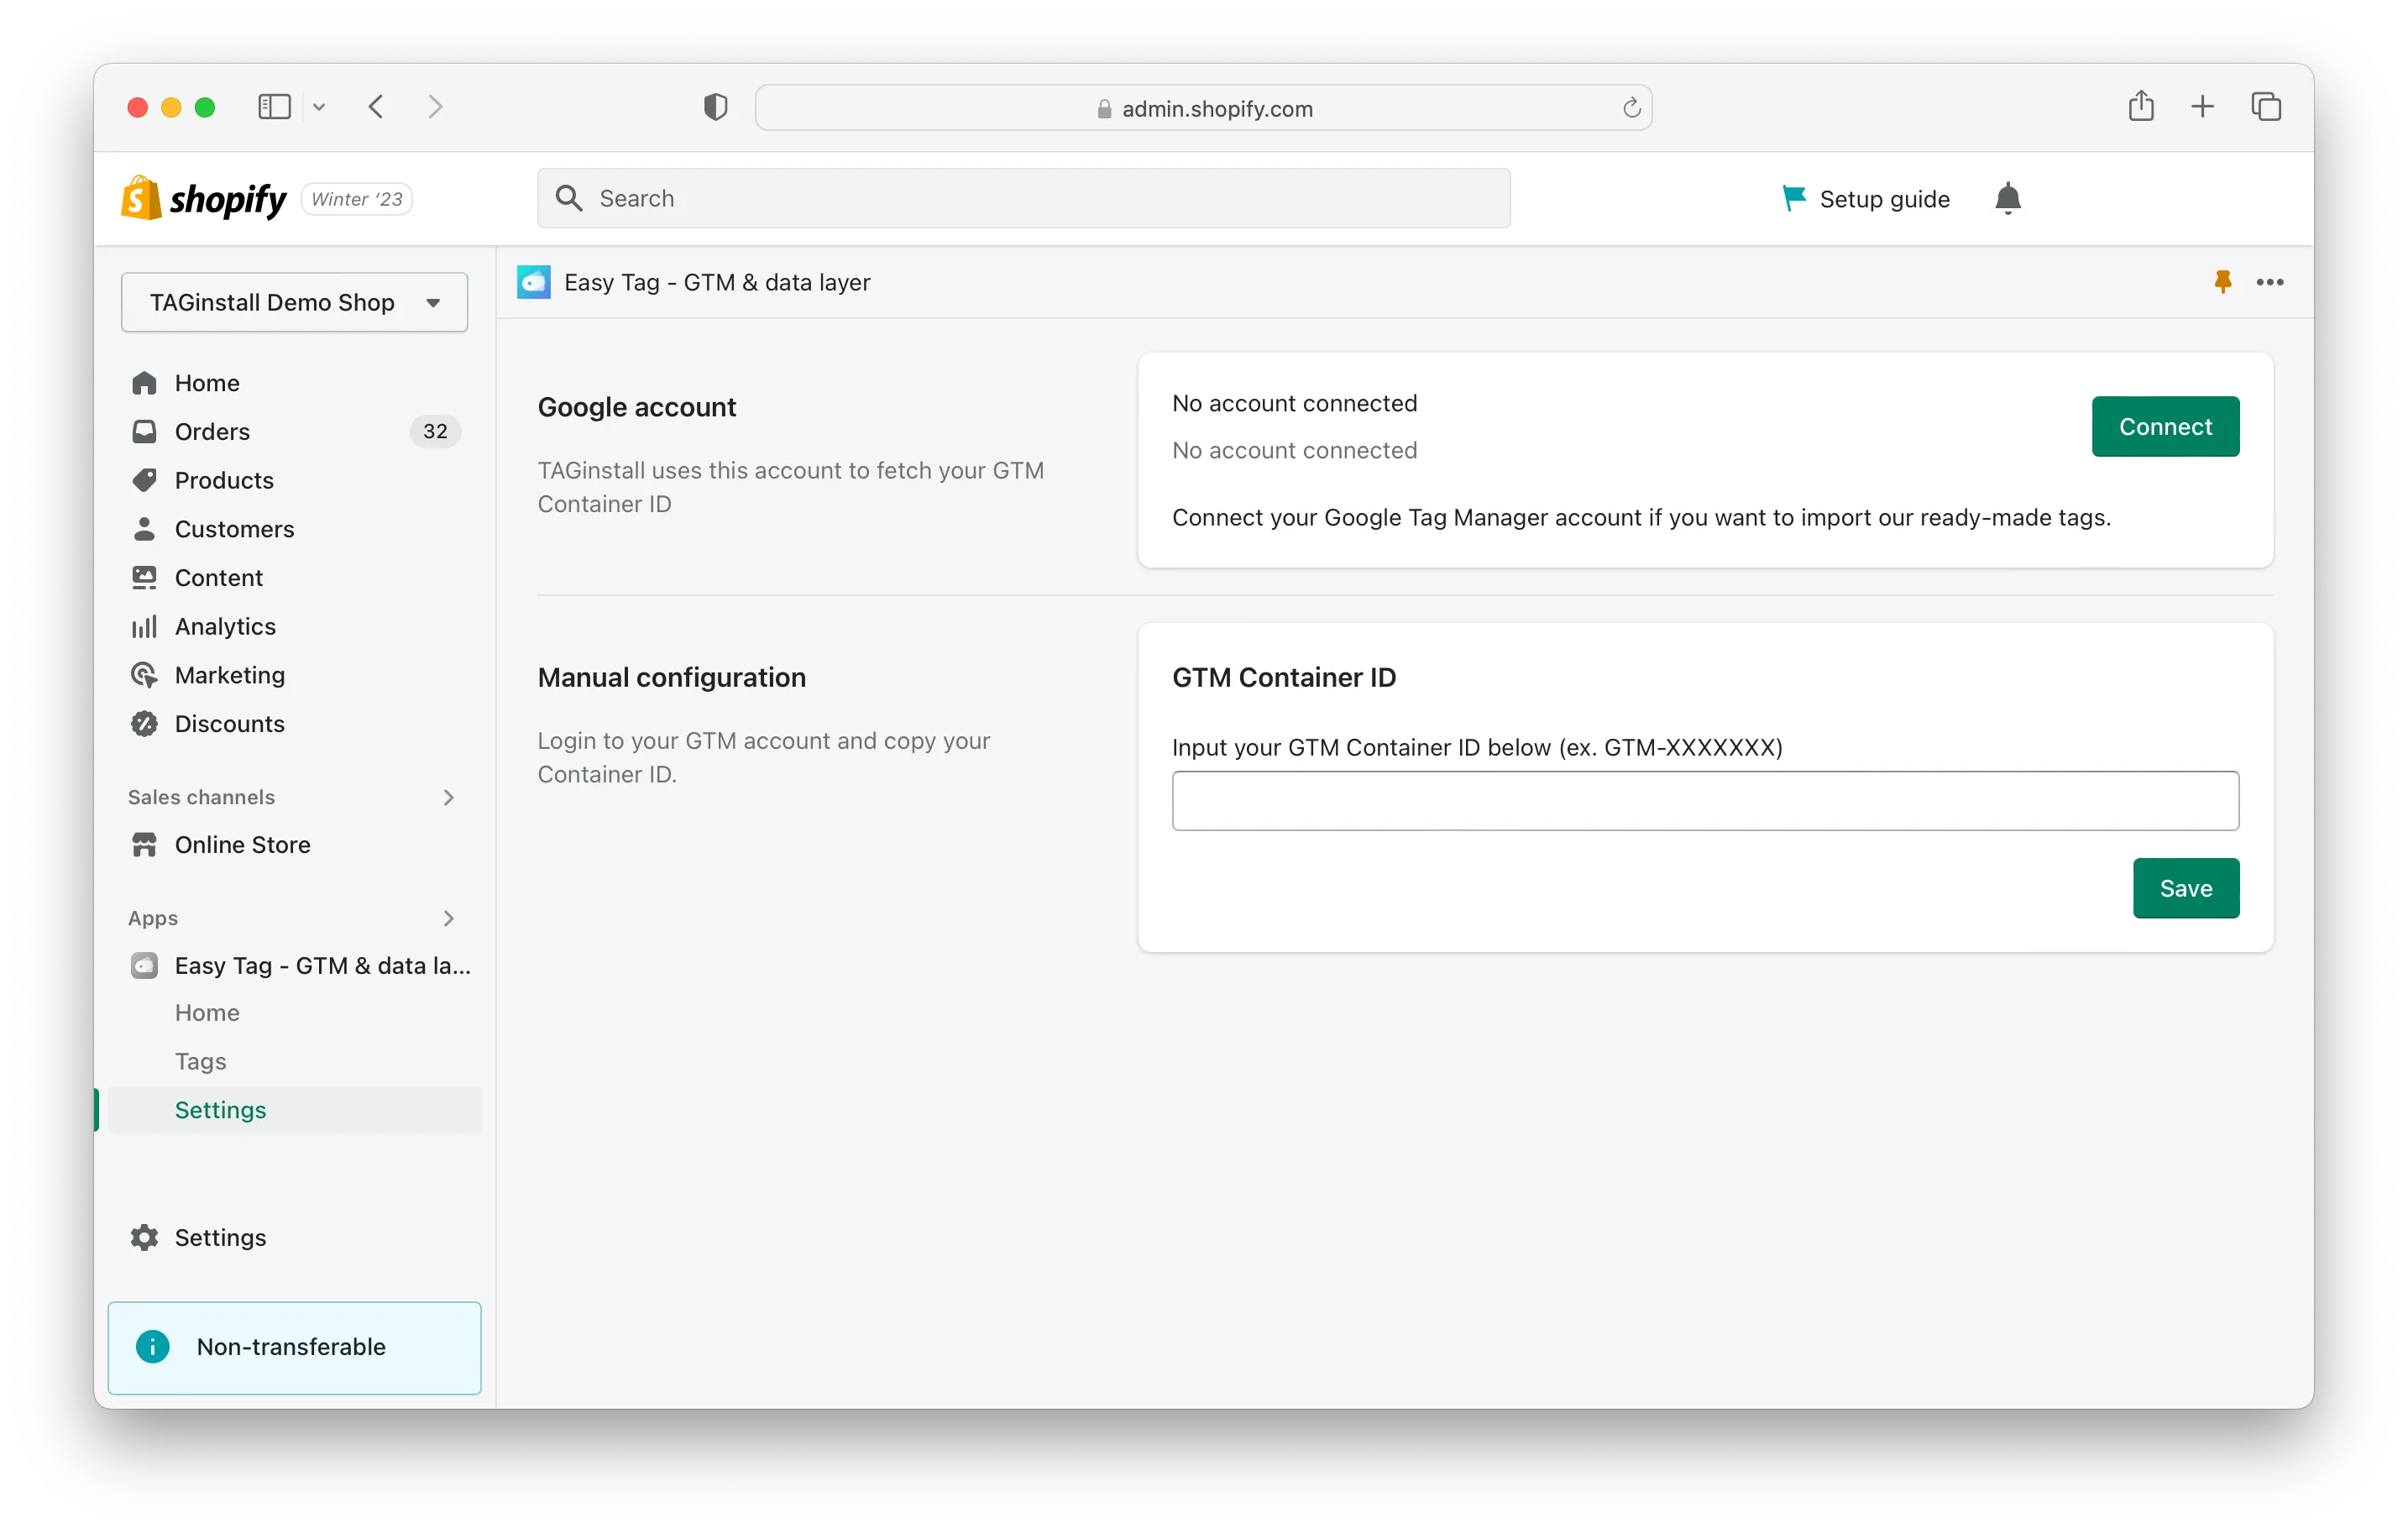
…then select your Google account (this account should have access to your Google Tag Manager account and container).
-
Authorize EasyTag
Select the two checkboxes and click “Continue”
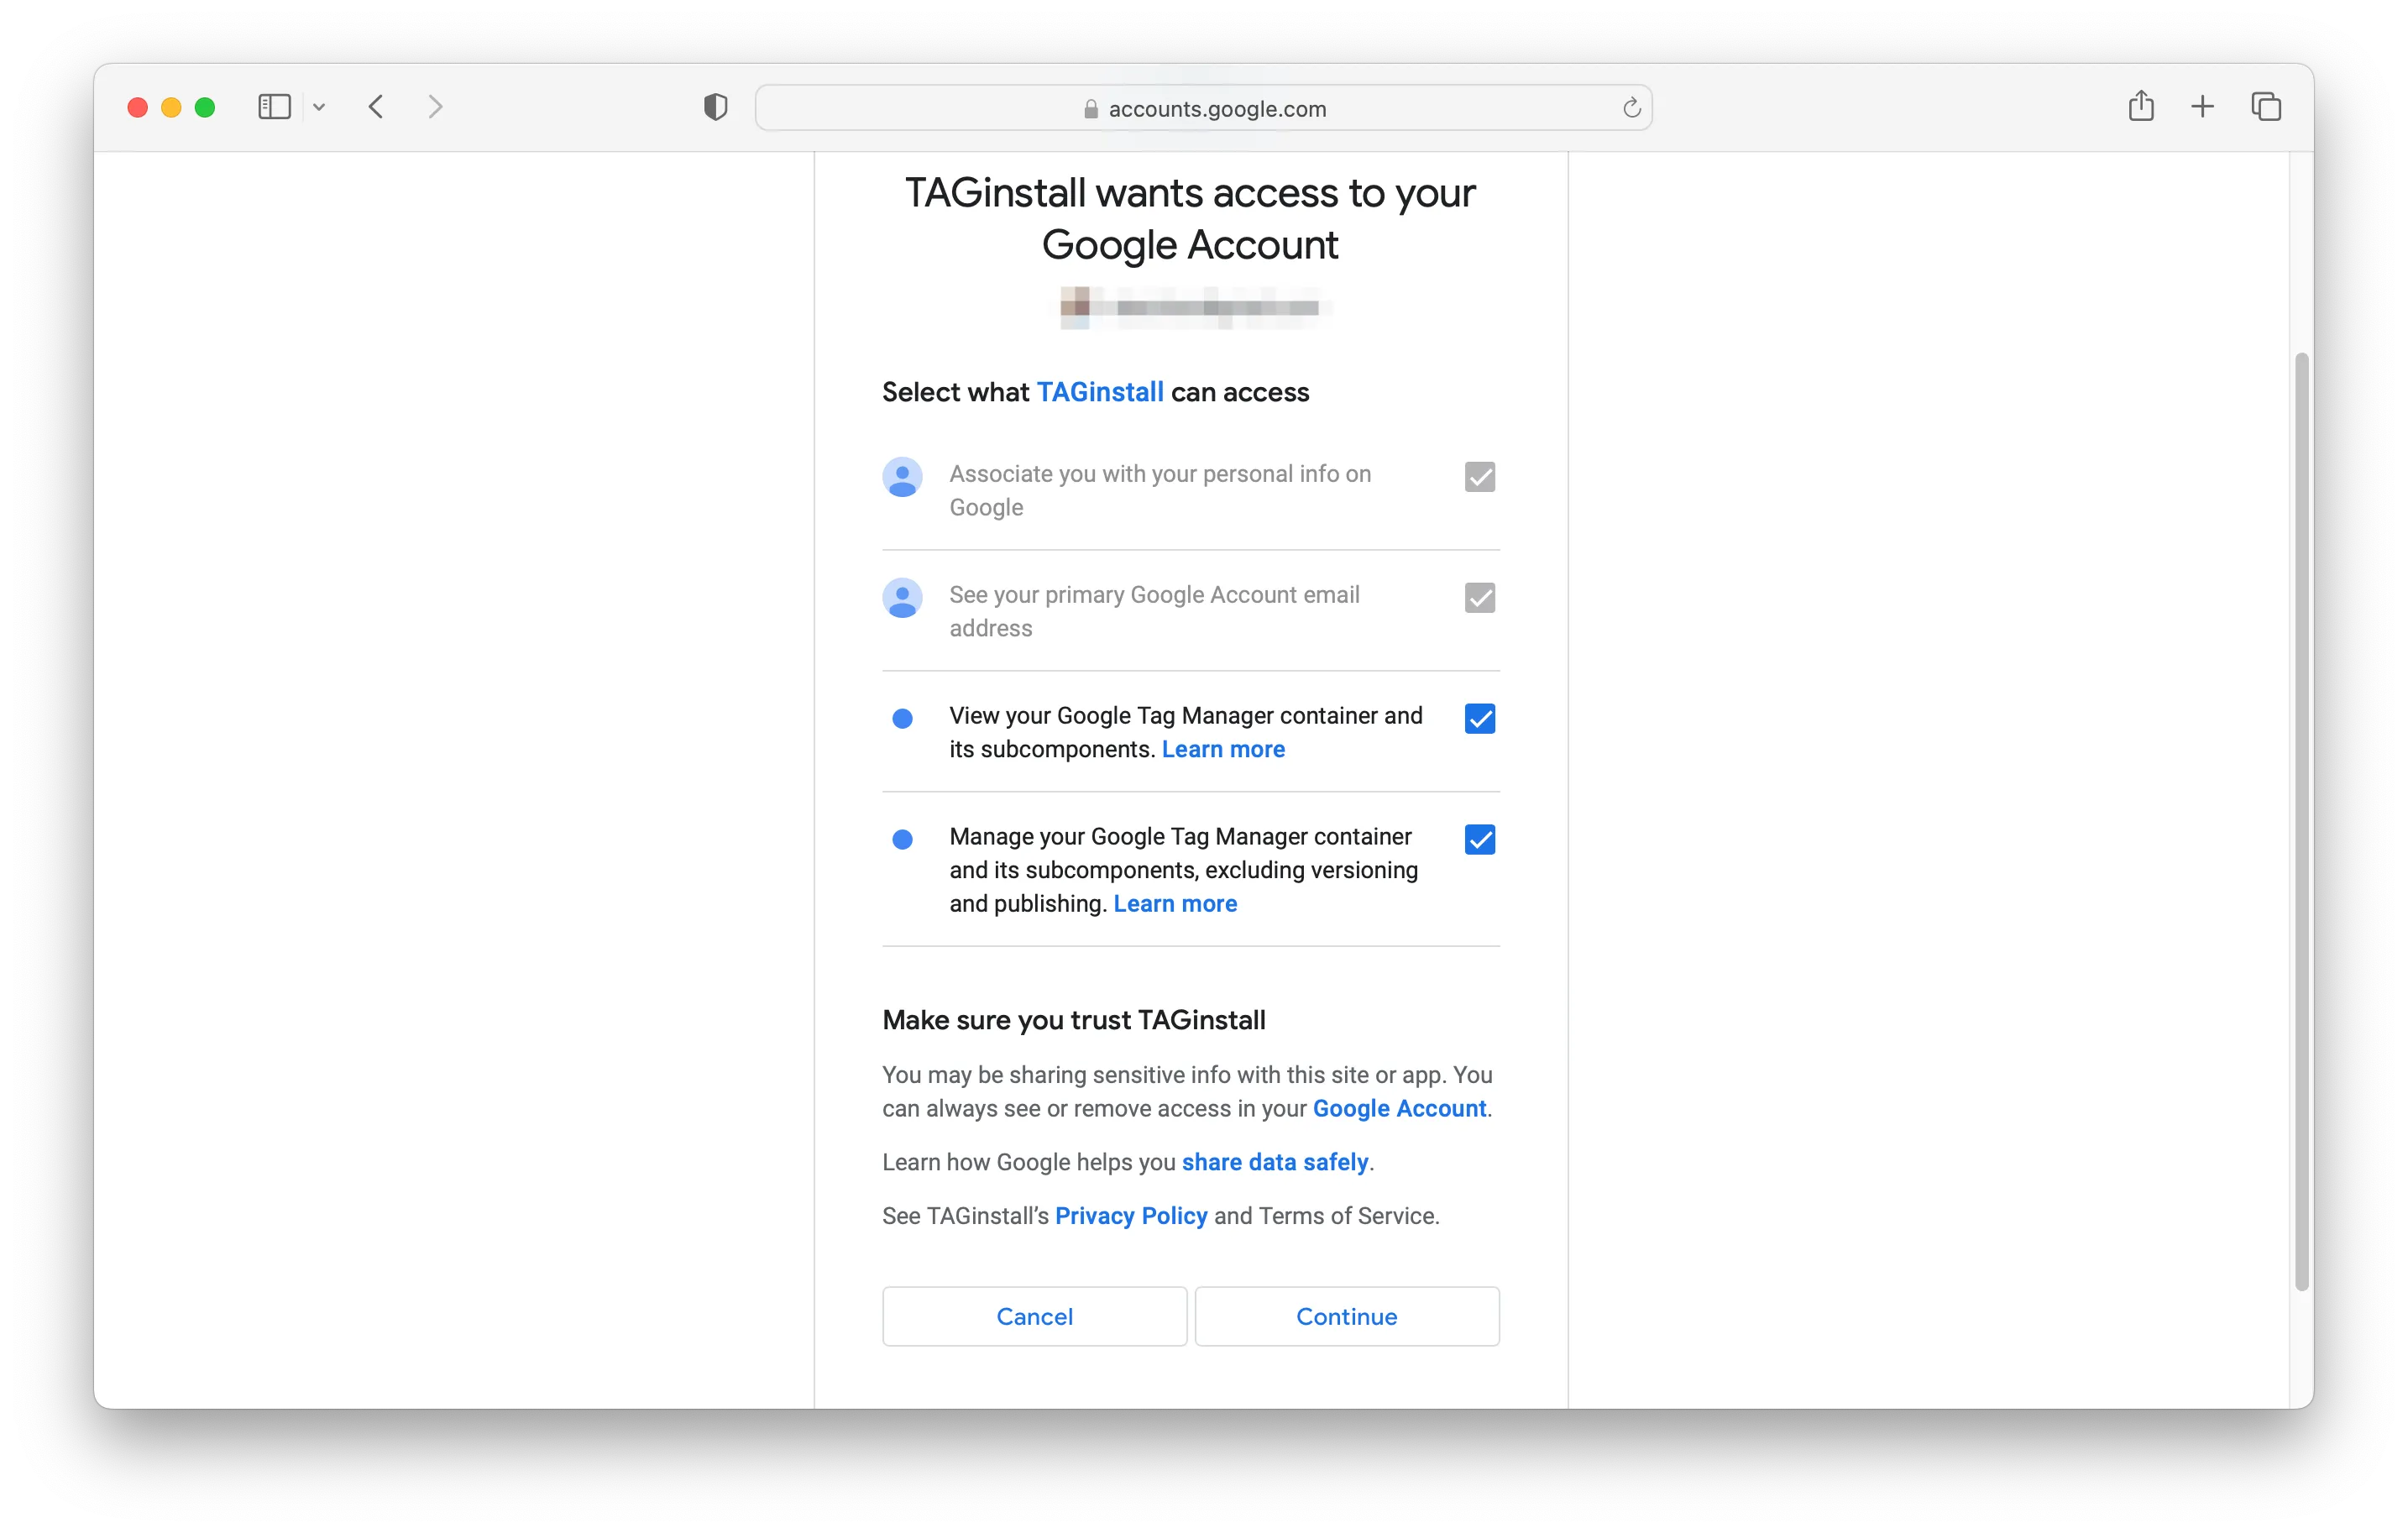
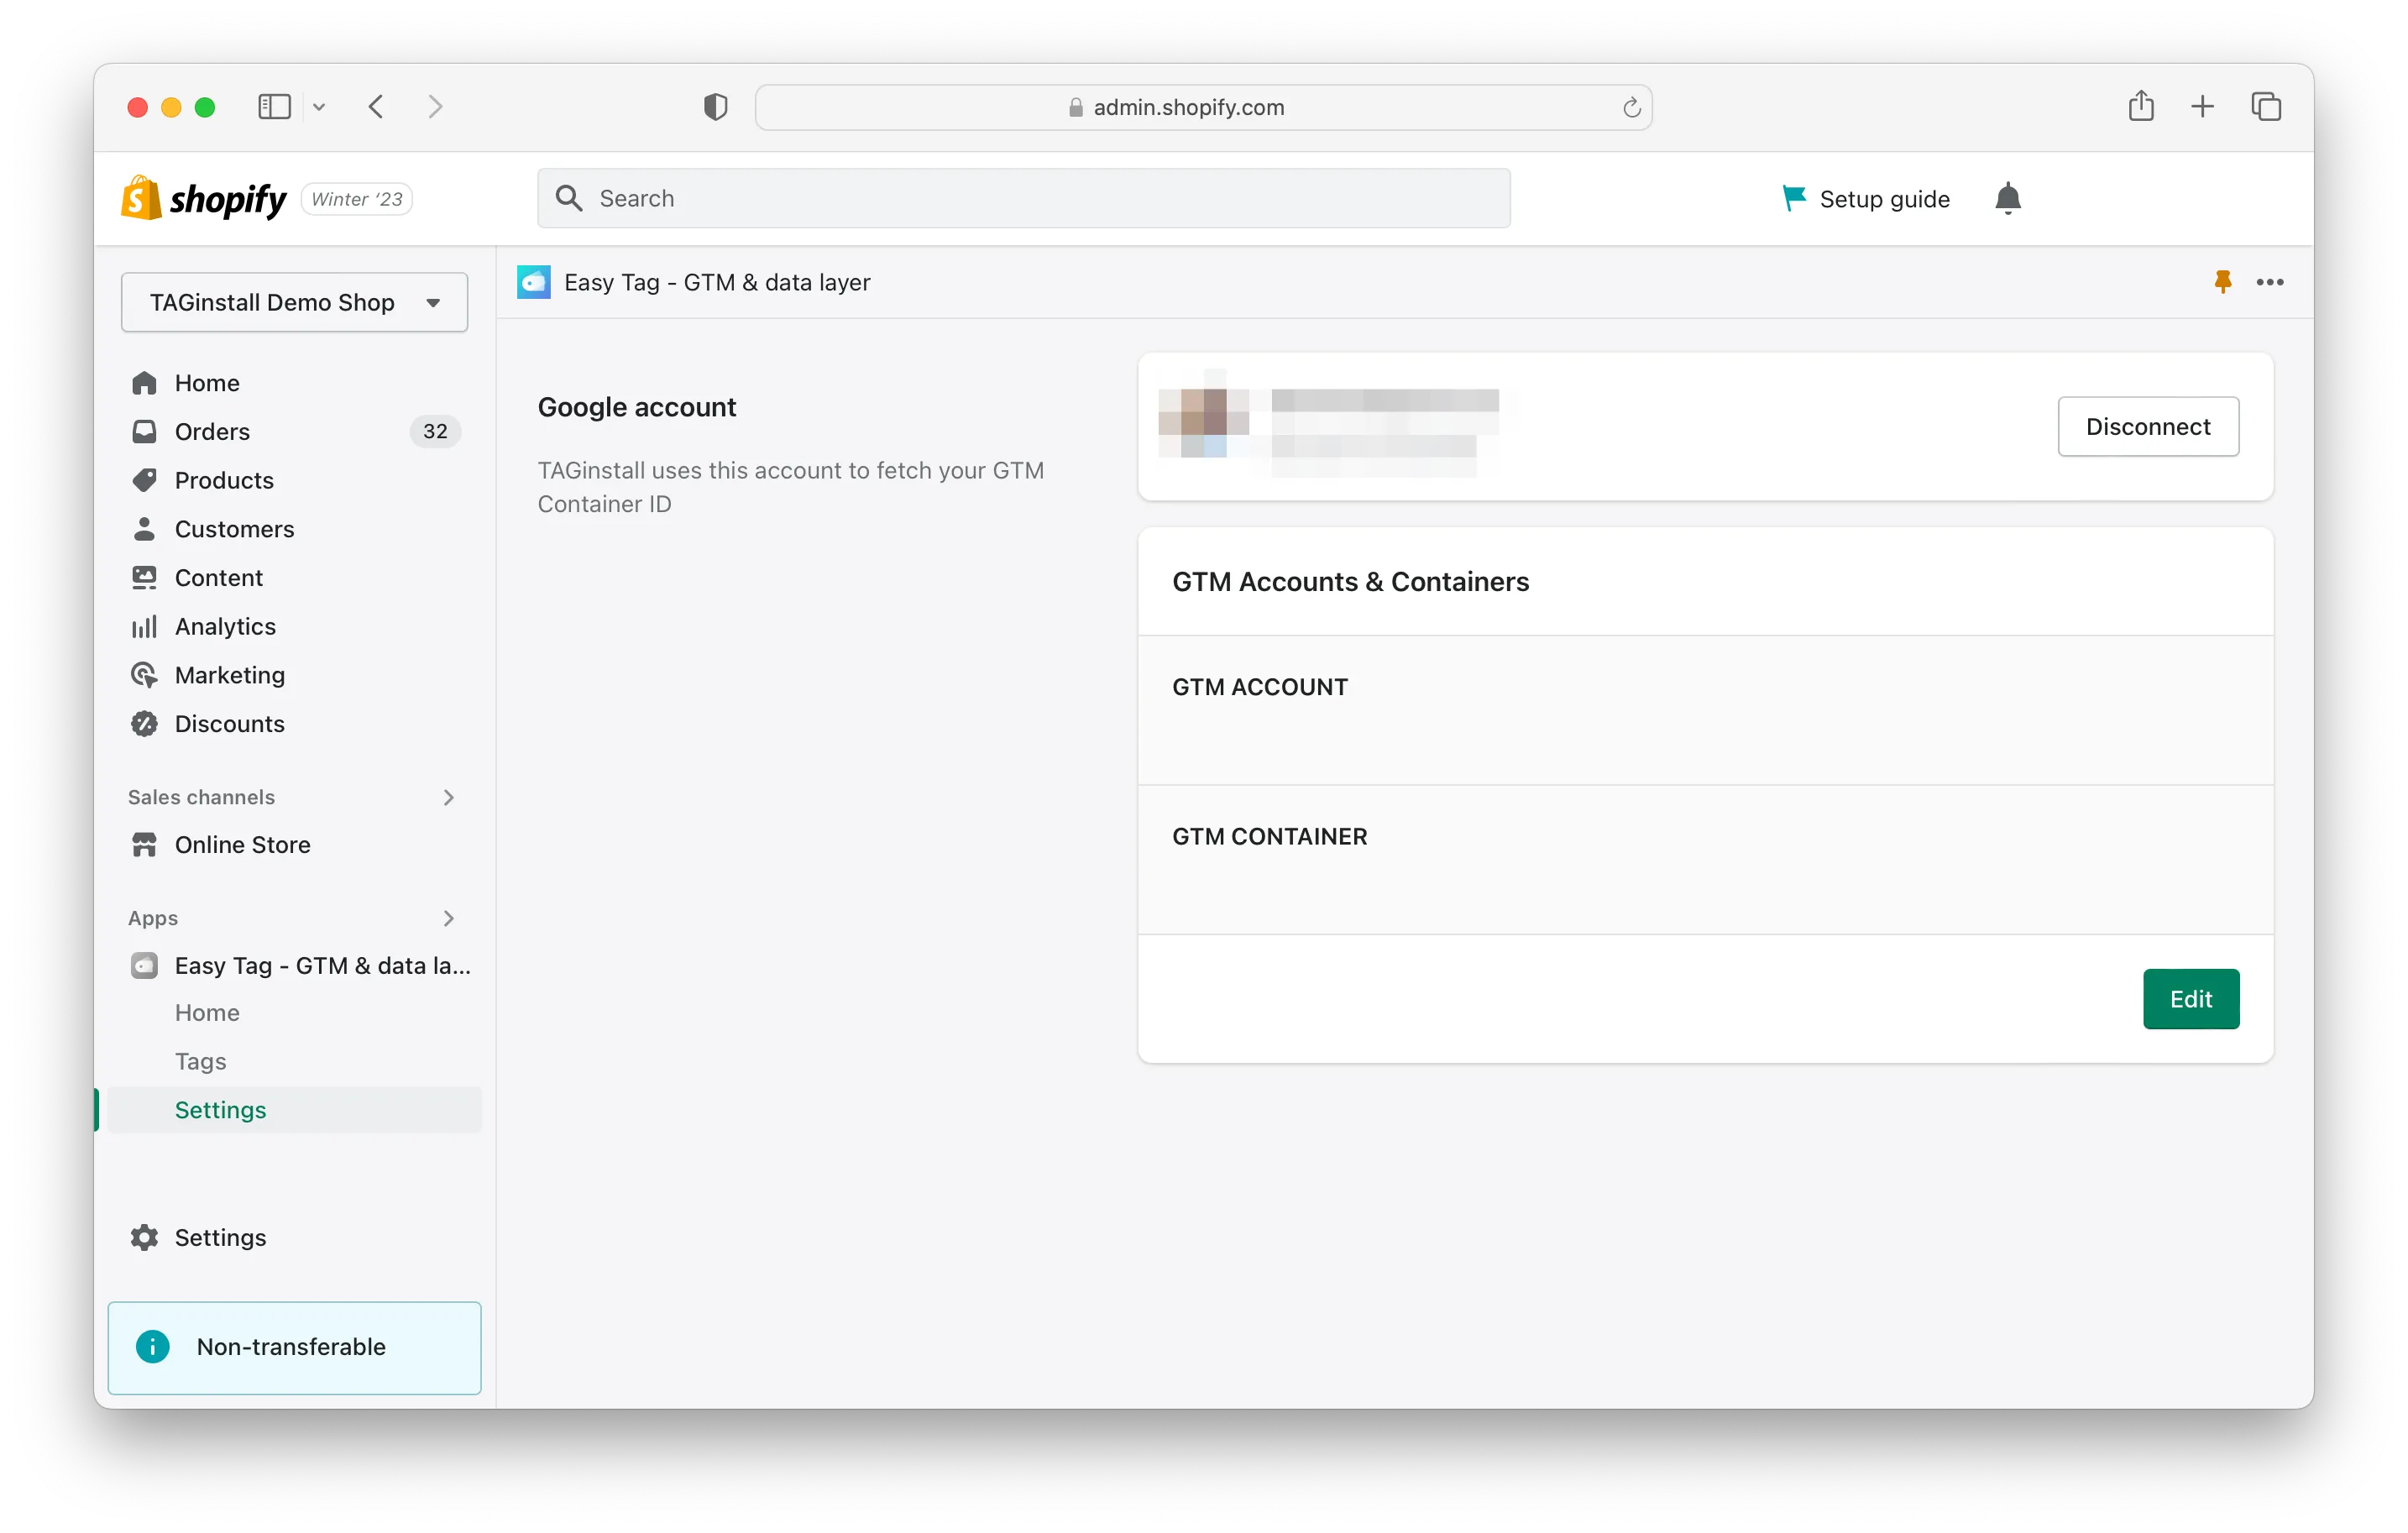
Now your Google account is connected. Click on the “Edit” button to select your GTM account and container.
-
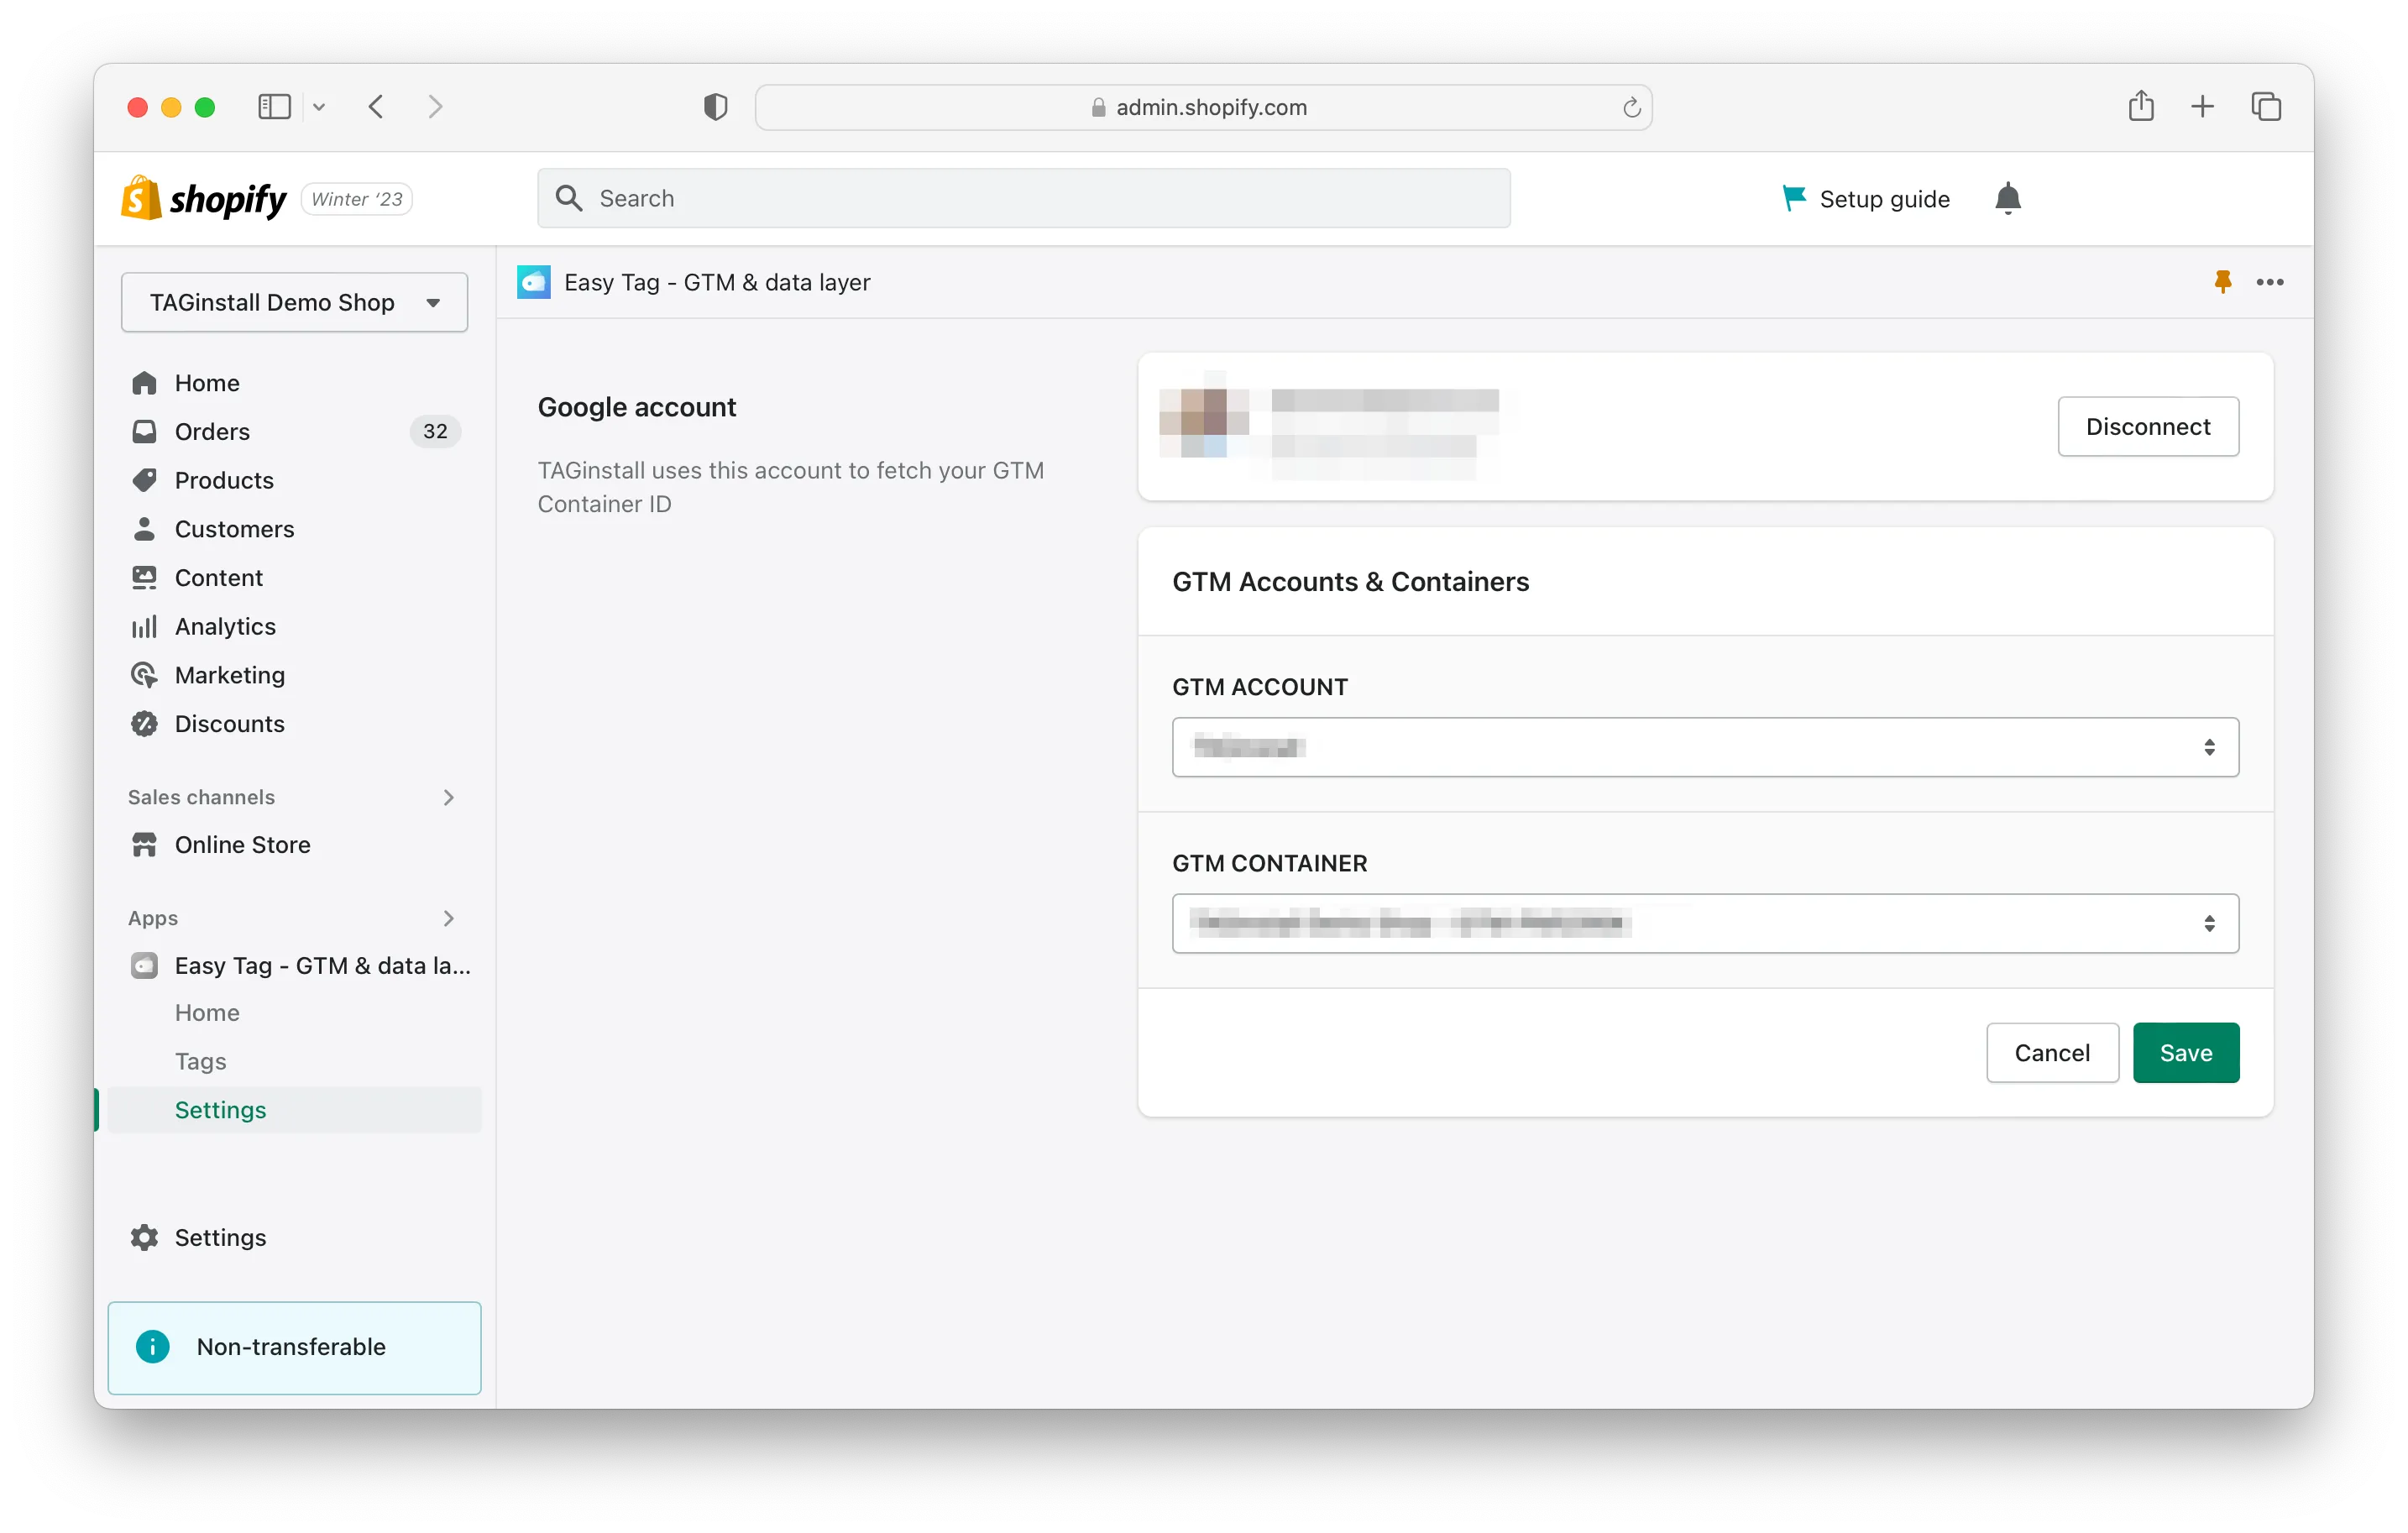
Select your Google Tag Manager account and container
When you select your account and container (make sure this is a “Web” container) click “Save”.
-
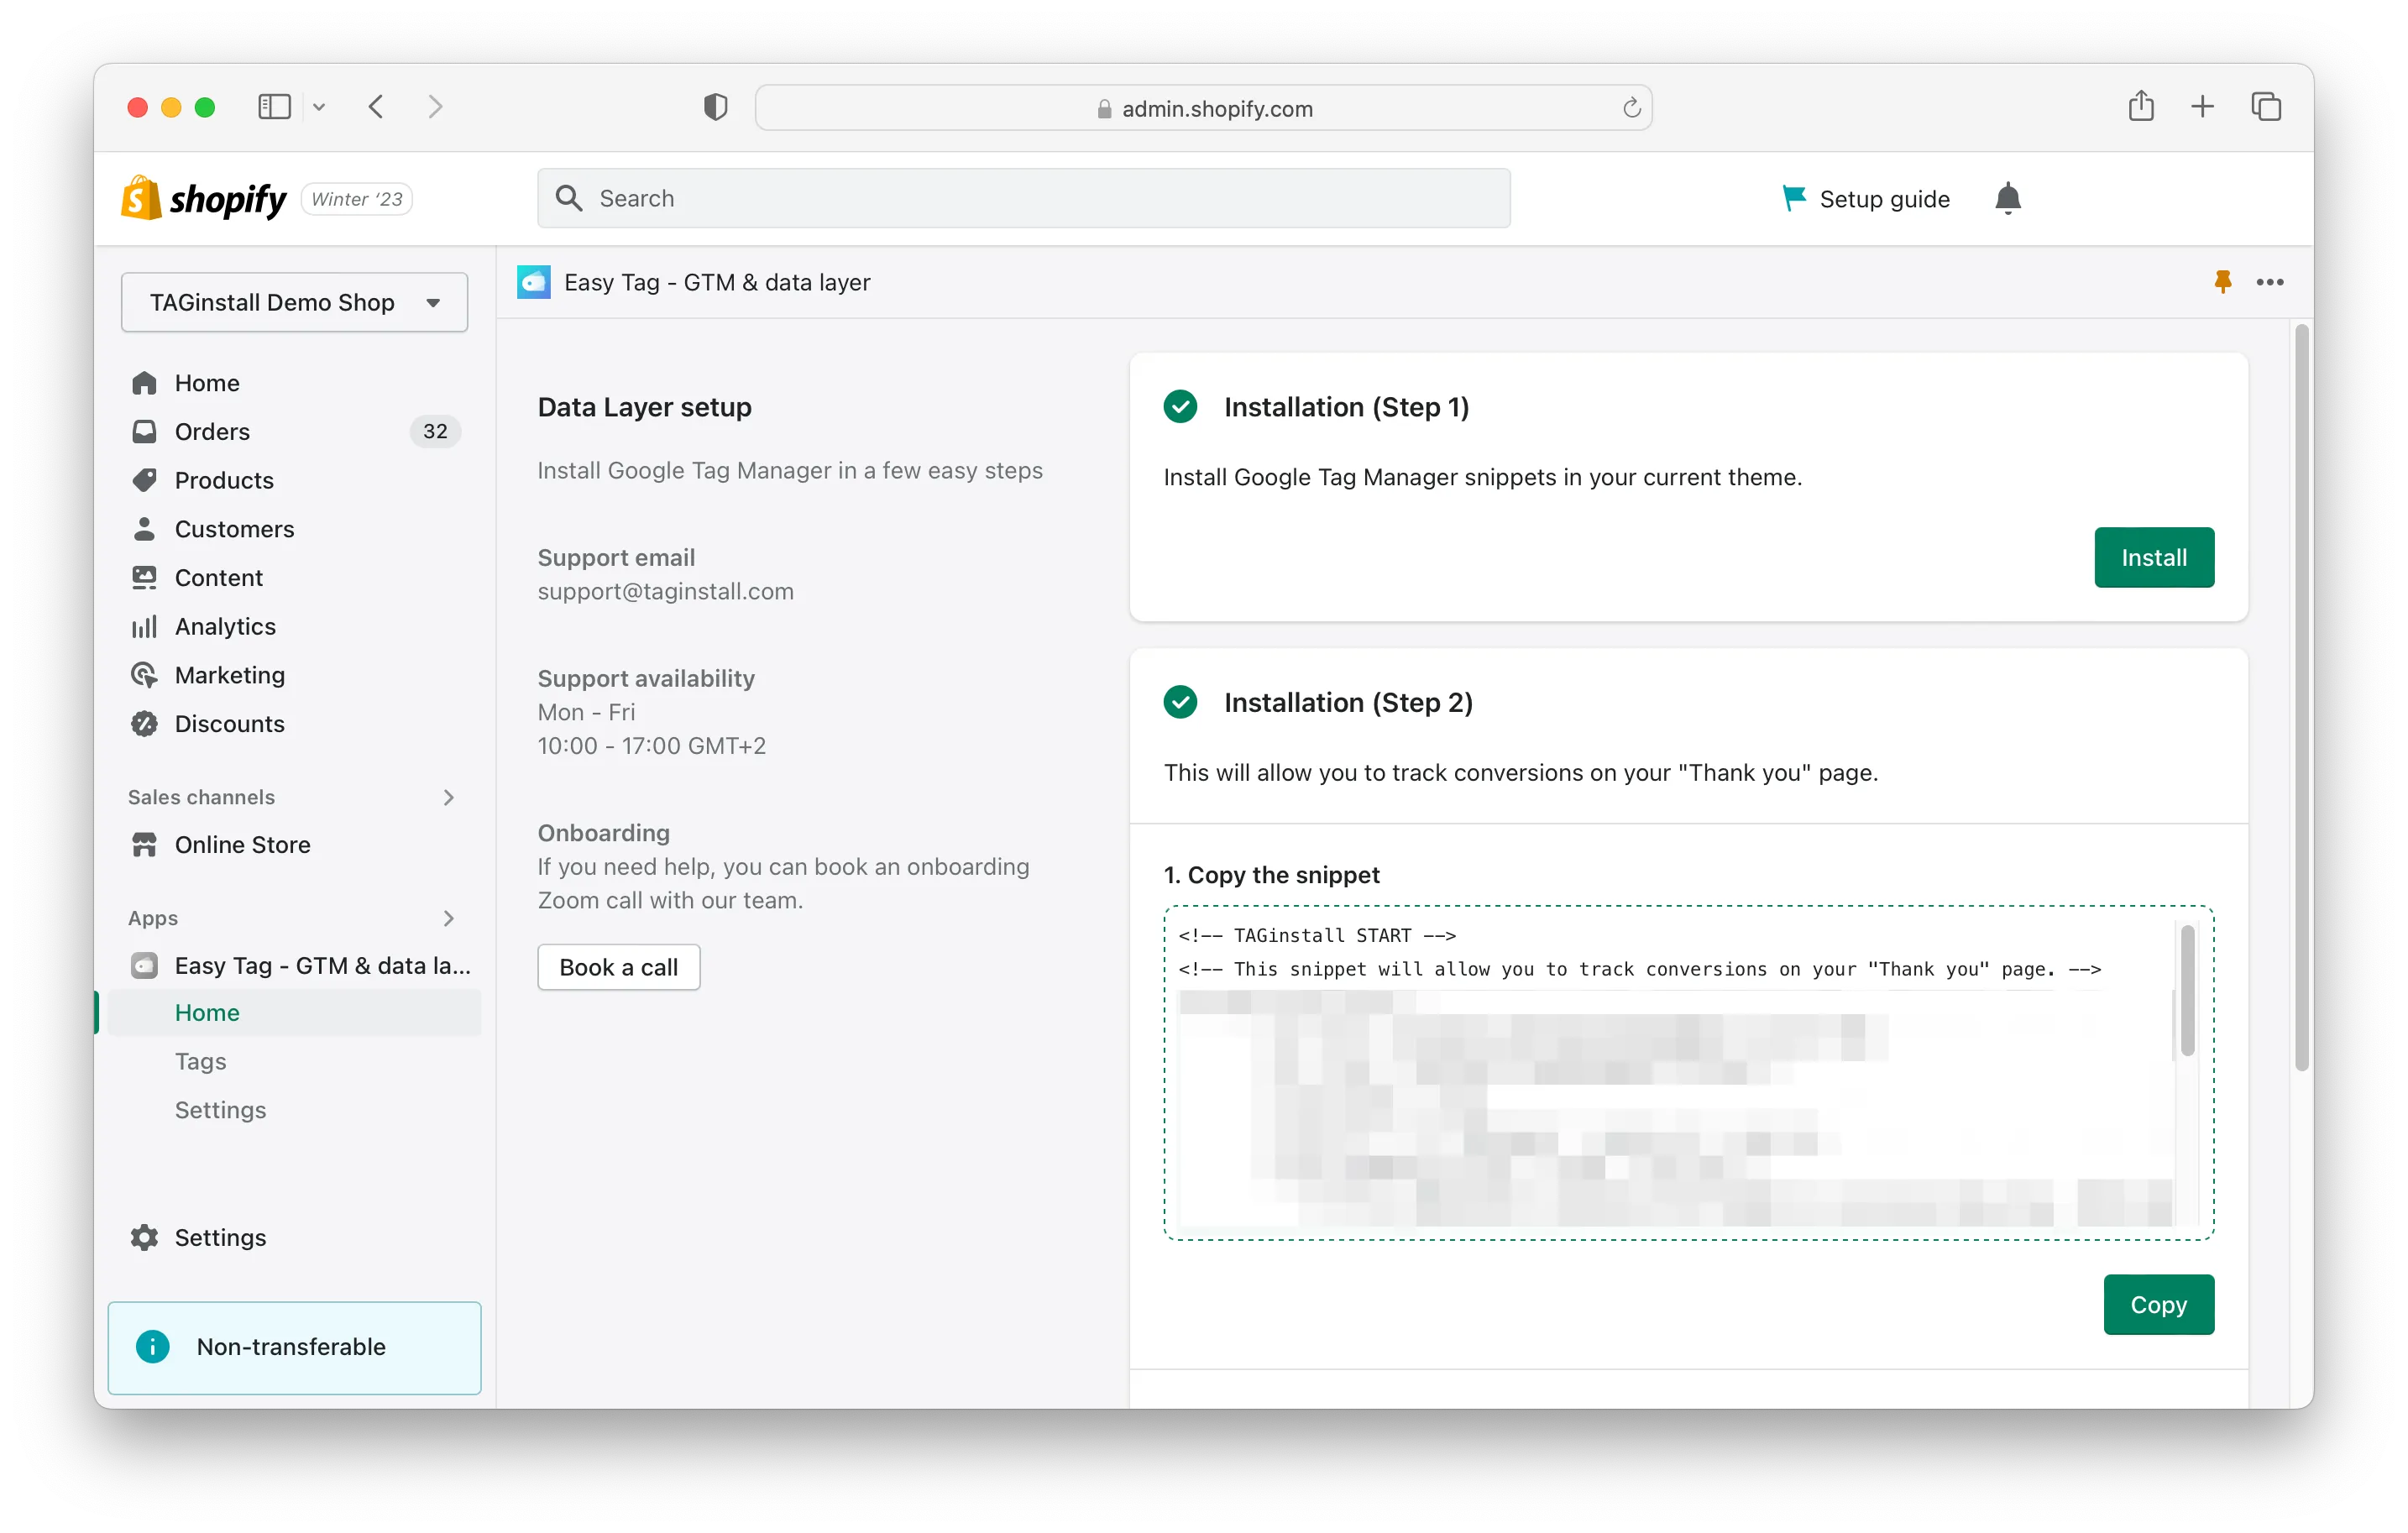
Install GTM snippets and our data layer in your theme
Go to EasyTag’s home screen and click the “Install” button in “Installation (Step 1)” to install Google Tag Manager snippets and our data layer in your current theme.

-
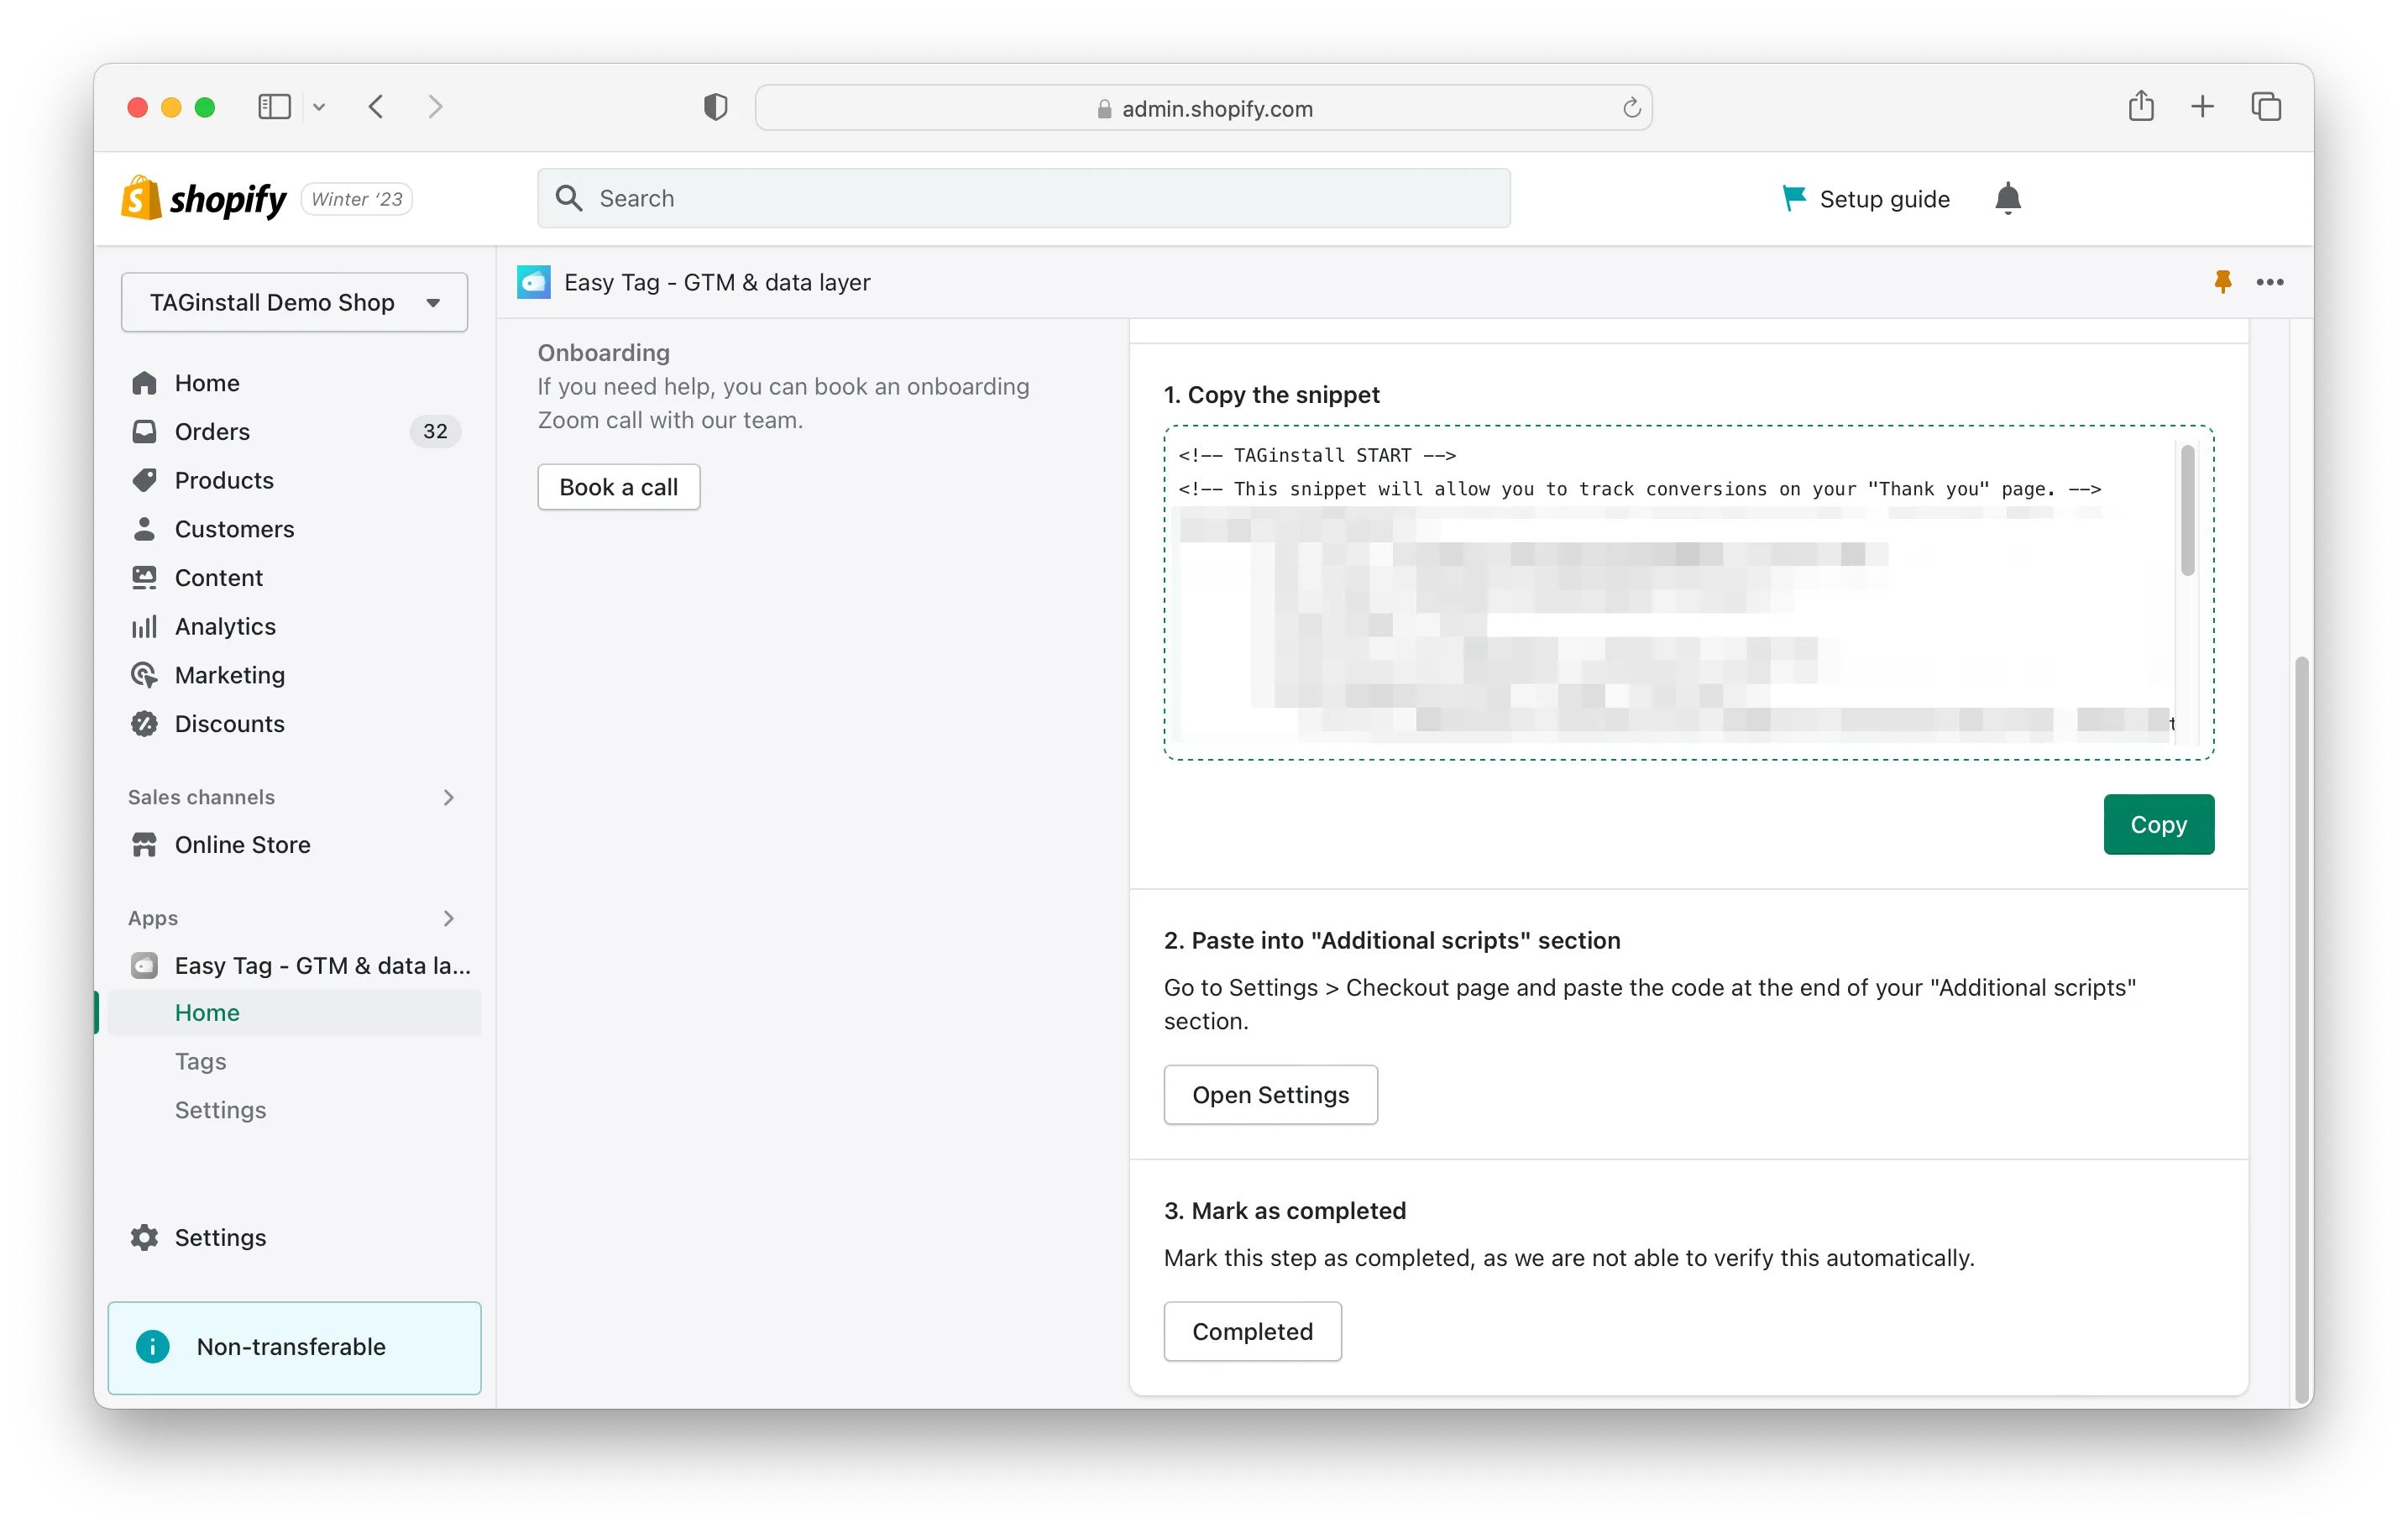
Copy the “Thank You” page snippet
Scroll down to “Installation (Step 2)” and click on the “Copy” button to copy our snippet, which will allow you to track conversions on your “Thank You” page.
-
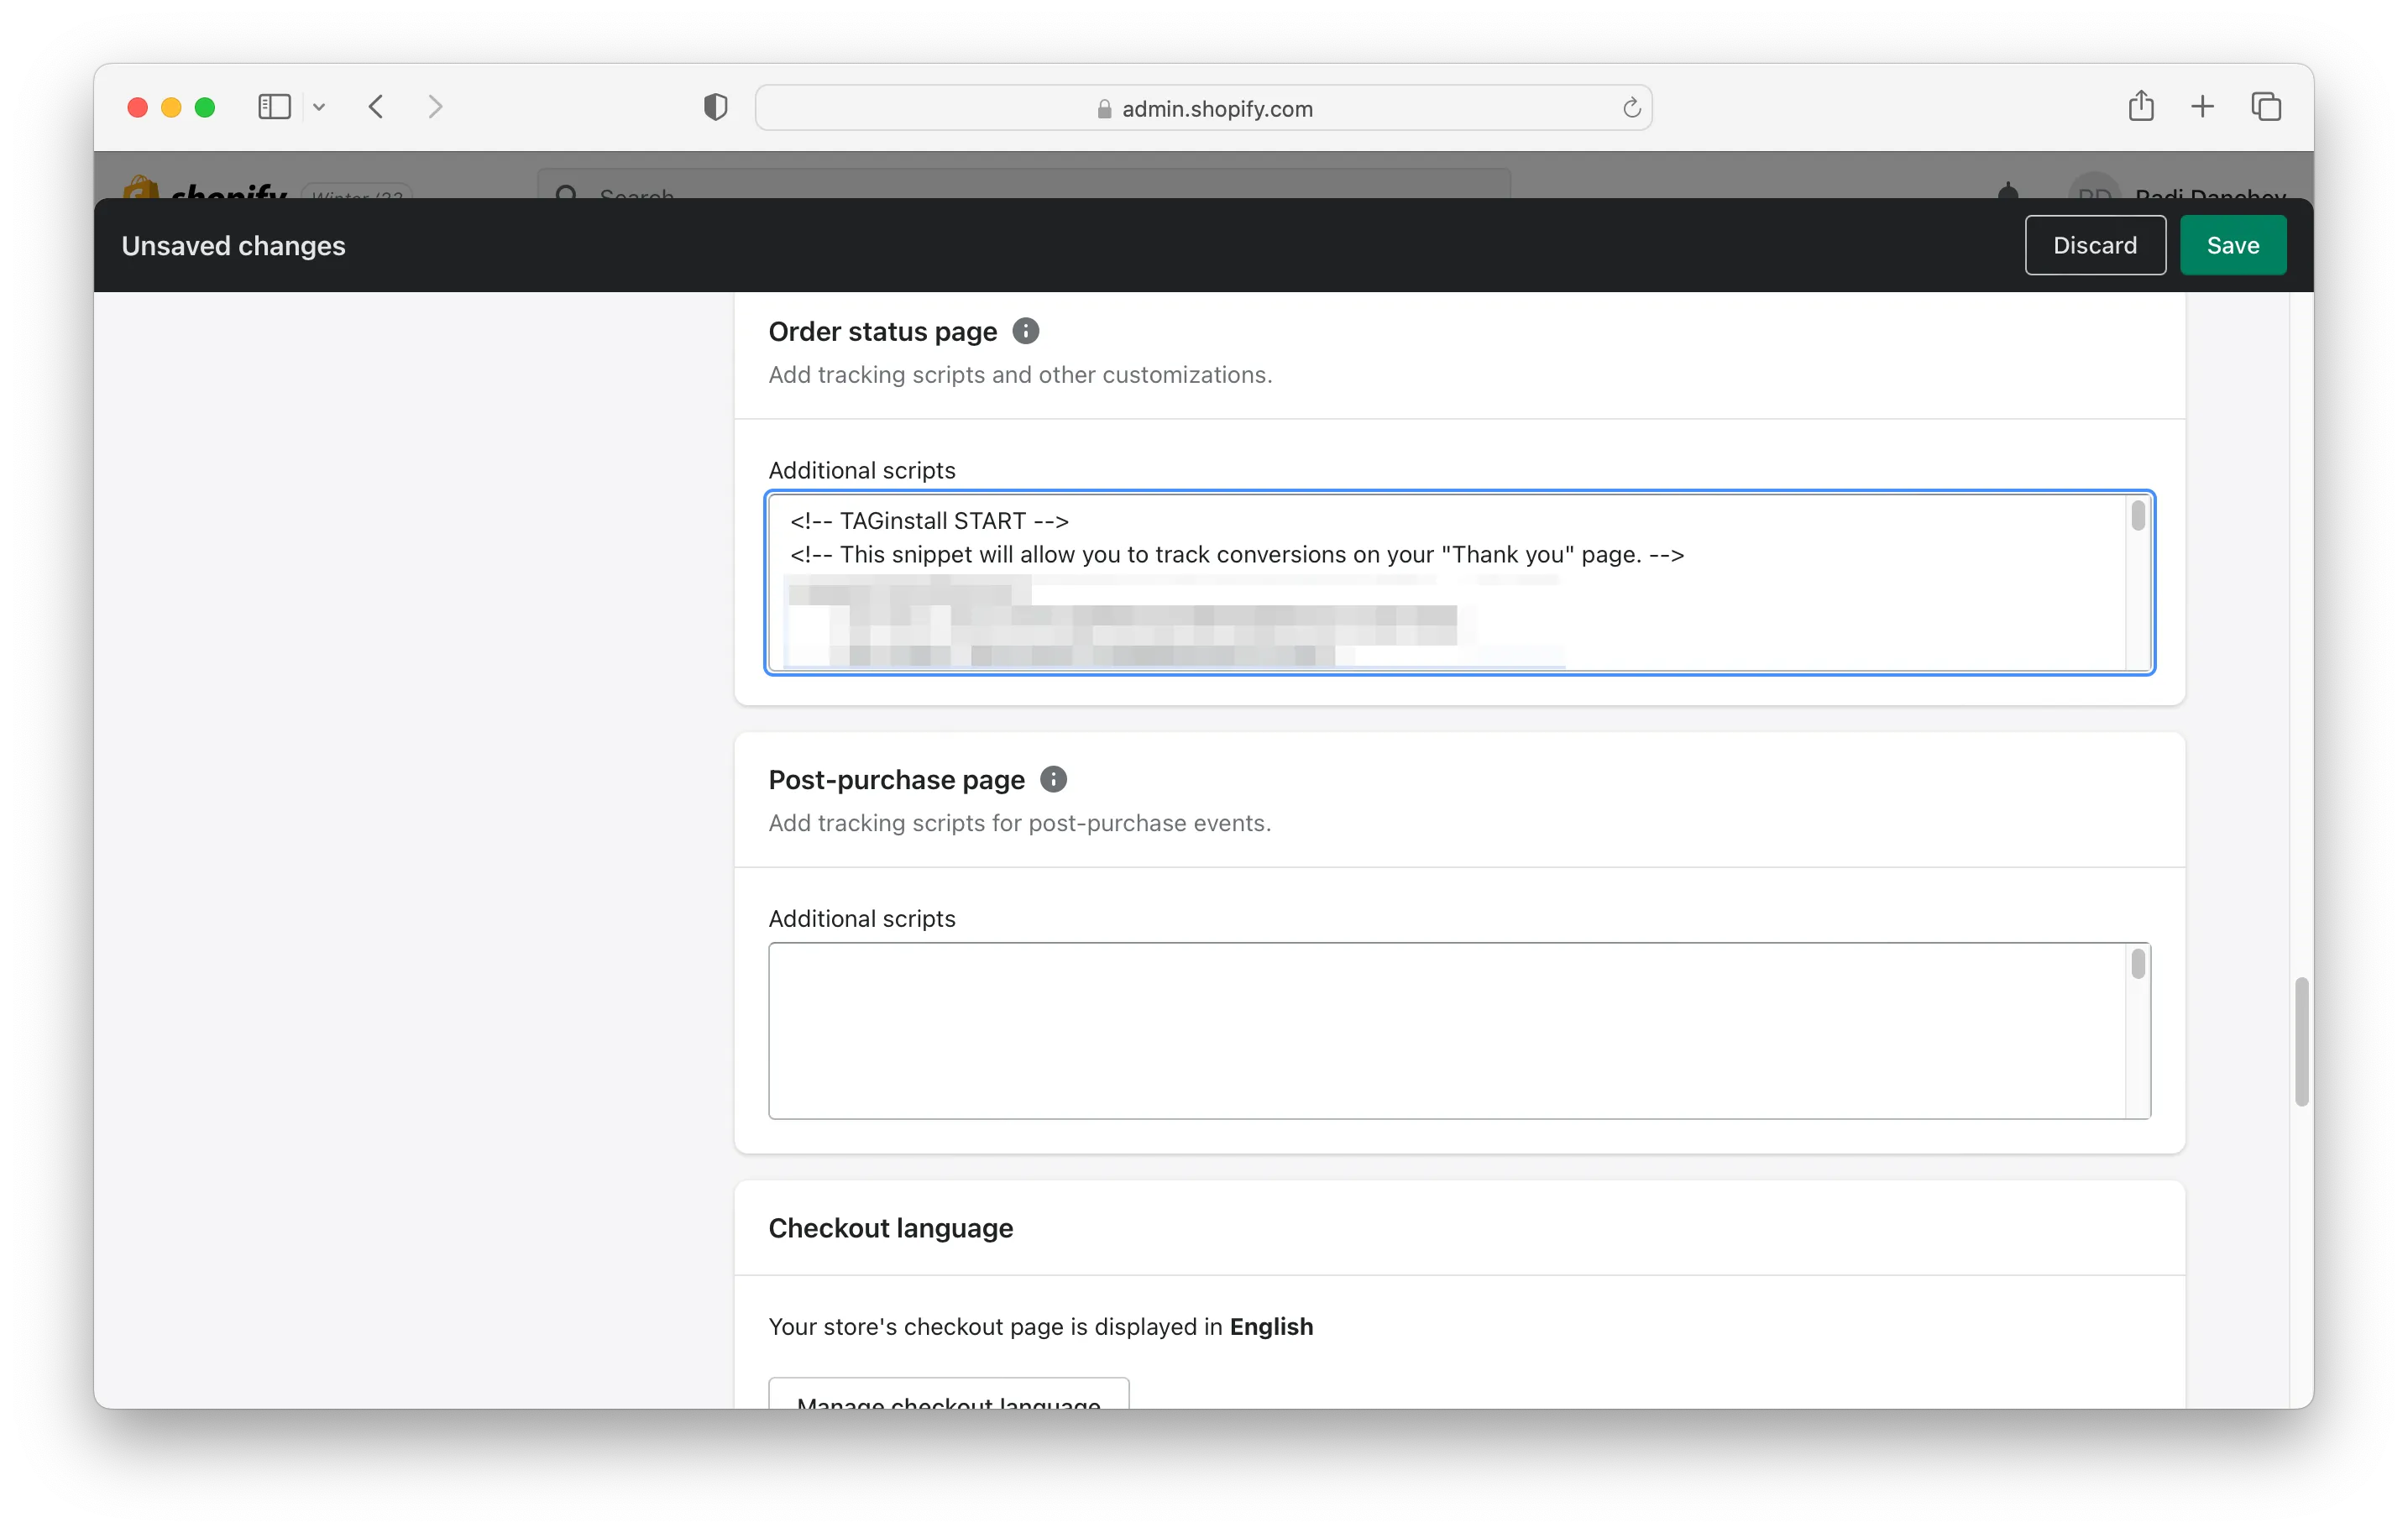
Paste the snippet in Settings -> Checkout and accounts
Click “Open Settings” button, and scroll down to “Order status page” section. Paste the snippet in the edit box under “Additional scripts”, click “Save” in the top right corner and close the Settings panel.
-
Complete the setup
In EasyTag’s home screen, scroll down and click the “Complete” button. If your screen looks like the one below, the your setup is completed.